Data Tables and Variants
|
if your Wix Products use Variants, those variants are automatically converted into tables during import. This tutorial demonstrates adding a Data Table to your template and shows other options for displaying Variants. To begin, double-click the Data Table Cell on the Stack to add it to the Design Pad. For the purposes of this tutorial, I've also added the Label and Data Cells for the Variants, though you wouldn't normally use the two together. Click the Data Table button on the Navigation Panel to continue. |

|
|
The Data Table Editor is similar to the Product Layout Editor except that the Stacks are on the top-right, and the Design Pad is on the bottom of the form. |

|
|
The Design Pad represents the optional Table Header, one row of Data, and an optional table-wide Notes Cell that prints below the Data Row.
As with the Product Layout Editor, double-click any Cell in the Stacks to add them to the Design Pad.
|
|
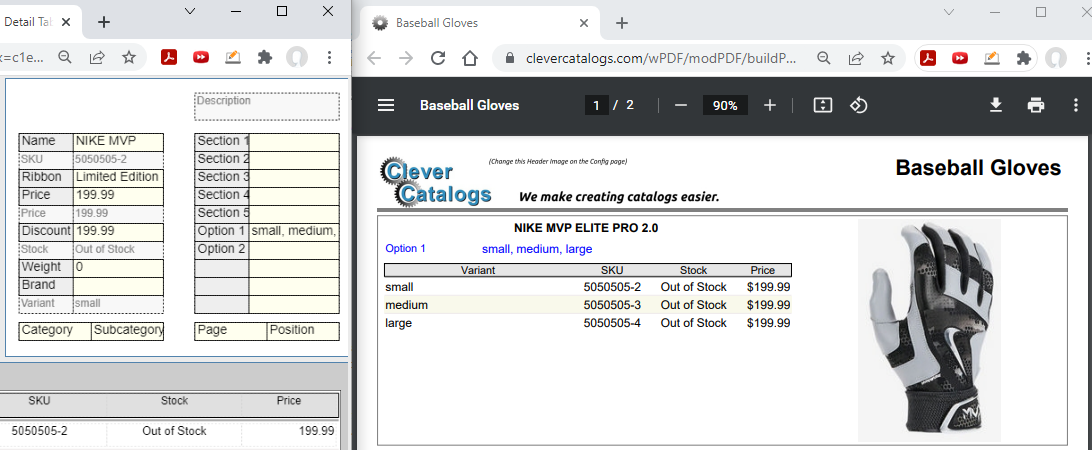
Here's a typical selection of cells in a Table and the resulting PDF. Commonly, the Product Name and Description
are part of the main Product Layout and only those fields that change between Variants are added to the Table.
|

|
|
In the above example, each of the 3 Variants in the Data Table is repeated in the blue "Option 1" Field added to the Product Layout. |
|

|
|
The examples above are from the same category, but the first product has only one of the options: Color. Option Labels, which print as Table Headers in a Data Table, can be changed from the Customize Tab on the Home Page. |


